Table of content
Warehouse associate’s (WA) capture stock quantities around the warehouse using the count scanning screen. From the stock take screen, the WA selects a count with the status ready or on hold then clicks the ‘count’ action button which opens the counting screen.
The stock count scanning screen
Below the header there are three boxes for location, barcode and product. Whilst the screen is optimised for barcode scaning, these boxes support keyboard and mouse operations. For example where in the event of a damaged barcode.

The count work flow is simple: Scan a location barcode then count products at that location. Select a new location and count inventory there. In the screenshot above, the scanning quantity is set to 1 and the location to J.3.A.0 (see the first row in the count area). Note, manually changing a quantity in a row does not bring the row to the top of the list.
Product scanning
When the WA scans a product barcode, its name, SKU and barcode number are added to the top row of the count. The most recently scanned product will always appear at the top of the list. If a quantity of the product has already been scanned for this location, Warewolf brings the product to the top of the list and increments by the scan quantity. For example in the screenshot, the WA scans the barcode ending 282, the product will come to the top with the count quantity of 3.
Outer quantity scanning
Before scanning, set the scanning quantity to the number of products in the outer. Each time the barcode is scanned, the outer quantity is added to the count


Don’t forget to change the scanning quantity back to 1 afterwards
Manually changing count quantities
Within the count row either over-type the quantity or use the +/- buttons to increment or decrement the row count quantity. This feature is illustrated in the last row of the screenshot above.
Manually entering a product barcode
Type in consecutive numbers from any part of the barcode. As you do so, Warewolf looks up all possible matching barcodes allowing the desired on to be selected.

Count location reminder
The location reminder, when set, gives WAs a reminder every so often that they haven’t changed location. Why is that? Experience suggests that WAs occasionally fixate on scanning products and forget to change location when they should: Especially for inexperienced WAs. The reminder helps to stop them wasting too much time and effort.
Lookup a product by its name
Start typing part of the product’s name into the product box. Warewolf provides a list of matches to select from.

Changing location
After count scanning the last product at a location, simply scan the next location barcode. Warewolf will create a new row at the top showing the location just entered. Start scanning products.
Manually entering locations
Start typing the location name into the location box. Warewolf will provide a list of possible matches from which you can select the appropriate location. (The value in brackest after the location name is the location barcode number. If you typed 118 into the location box, Warewolf would show you location j.2.A.0

To do action button
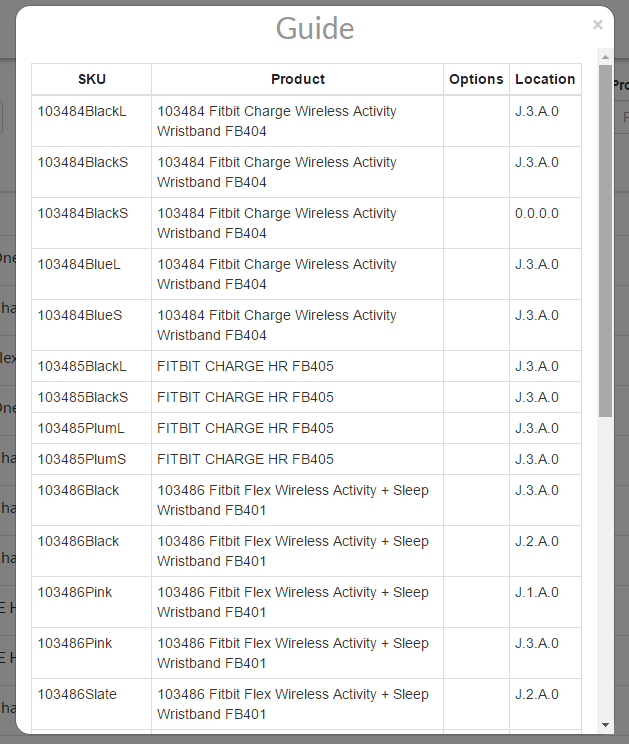
Where the count was created with a guide for SKU, location or both, the WA can hit the ‘to do’ action button to view a list of where and what they should be counting.
Here is the to do guide for our example above.


If you are a manager creating counts we suggest that you use the guide as follows:
Stocktake type Location SKU
Location Yes No
Brand Yes Optional
Category Yes Yes
High value Yes Yes
Top sellers Yes Yes
Count parking
WAs can put a count ‘on hold’ by hitting the ‘park’ action button at any time. The count is closed and its status is changed to ‘on hold’. After their break, WAs select the count again then select ‘count’ to continue from where they were.
Count submission
On completion of count scanning, WAs click the ‘submit’ button to close the count and set its status to ‘ready for review’
Last Update: January 18, 2017