Table of content
How to manage deliveries with Warewolf | First step, create a delivery
Deliveries (or goods-in) is the process of accepting goods from your suppliers and customers. In this article we discover how to manage deliveries with Warewolf. Warewolf’s deliveries module provides your team with functionality to:
- Accurately receive goods from suppliers (and customer returns), trapping supplier overs and unders, incorrect products delivered and unacceptably early or late deliveries
- Manage such exceptions efficiently
- Enable incoming deliveries to be split to cover sales orders awaiting deliveries, transfers to other warehouses (also known as cross docking) and for put away to the receiving warehouse
- Support receiving goods where no purchase order (PO) or sales credit (SC) exists.
Create a delivery
The first step in deliveries is to create a ‘delivery’ and associate it to existing POs or SCs from your channel. A delivery can be created without an association, allowing the goods to be received first. Then, a PO or SC can be created on the channel after receipt and the association can be made at the end.
From deliveries on the main menu, open the deliveries screen. Next, click the ‘create new’ action button which opens the create new delivery modal.
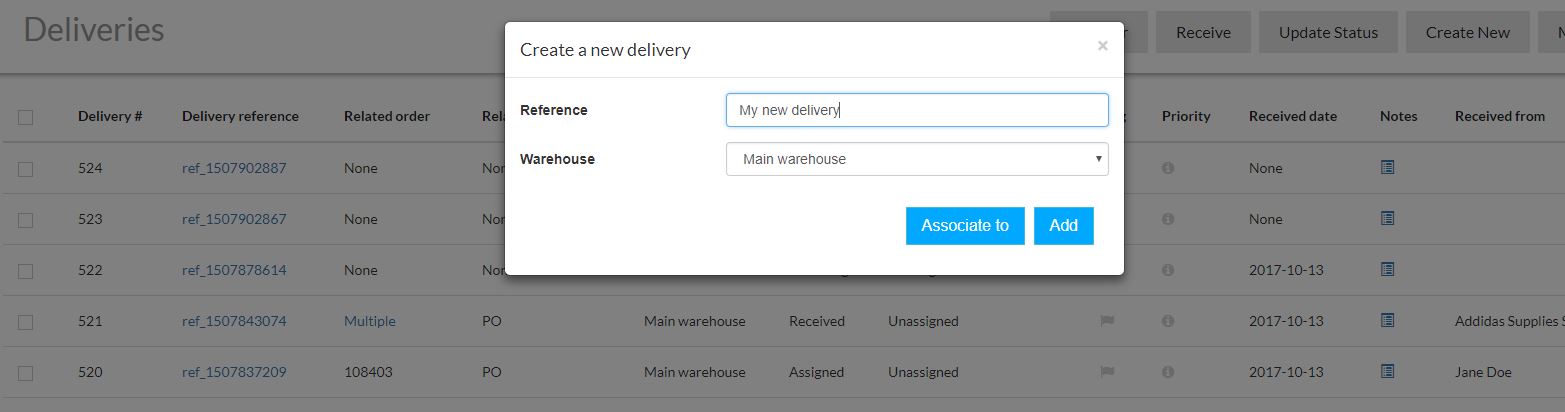
Provide a reference for the new delivery and select a warehouse to receive the goods into. Note, the receiving warehouse and location may be changed later in the delivery process. Next, either click ‘add’ to create the delivery without an association to a PO or SC. Or, click ‘associate to’ to make an association.
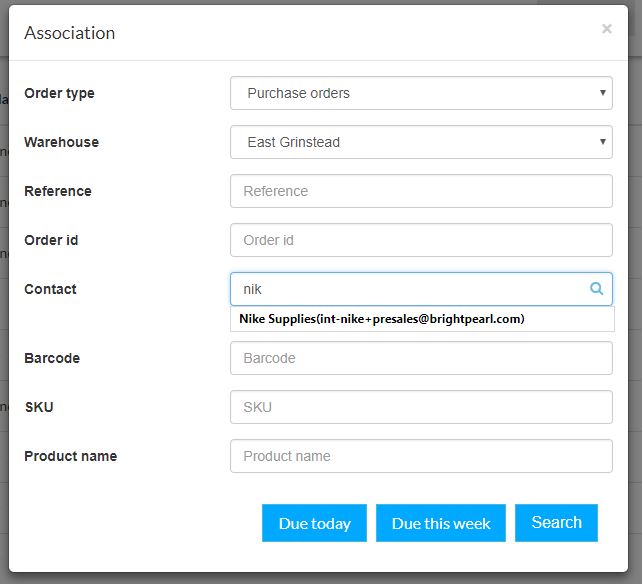
After clicking ‘associate to’, Warewolf opens a modal enabling you to set filters to search for relevant POs and SCs for the delivery.
- Order type: Either purchase orders or sales credits
- Warehouse: Warewolf allows you to receive orders which were originally placed on any warehouse
- Reference: If you have an order reference available, enter it here. For example, your original purchase order number from the supplier’s delivery note
- Order id: The order number from your channel
- Contact: The supplier or customer name. Start typing and Warewolf will provide a list of matched to select from
- Barcode: Scan a barcode from a product in the delivery and Warewolf will search for orders that match
- SKU: Similarly Warewolf will search for orders which contain the provided SKU
- Product name: Likewise, Warewolf searches by product name
The next step in how to manage deliveries with Warewolf is to select one of the three search options. ‘Due today’ will return only orders that match the filters and where the channel delivery date has today’s date.
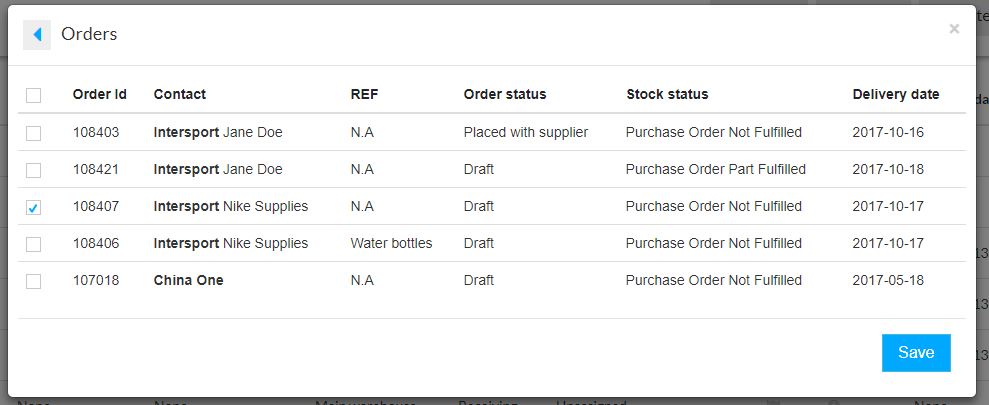
The orders list returned by Warewolf allows one or more orders to be associated with the delivery. This is particularly useful where several small POs or SCs can be processed by a warehouse assistant (WA) in one go. Note, deliveries from multiple suppliers or SCs from many customers are allowed.
Make a selection and click ‘save’. If you can’t find the orders you need, click on the back button to return to the search screen and amend the filter selections.
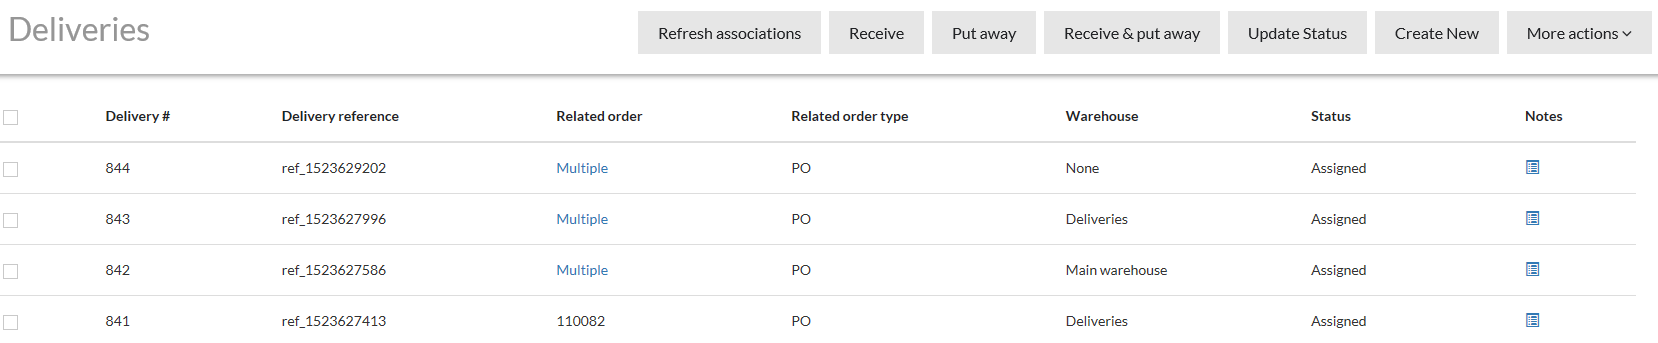
Your new delivery now appears at the top of the deliveries screen.
Manage deliveries with statuses
Delivery status changes facilitate Warewolf’s delivery workflow. Statuses are configured in deliveries>delivery statuses. In this screen, mappings are made to channel statuses. Since channel statuses for purchase orders and sales credits are often different, PO and SC mappings are supported. Warewolf uses the following statuses internally to manage deliveries: they may not be changed in delivery statuses. These are:
Unassigned
Assigned
Receiving
Part received
Received
Putting away
Part put away
Put away
Parked
We suggest that you create these statuses in your channel so that Warewolf can keep the channel up to date with delivery progress. You can of course map these fixed delivery status names to different names in your channel but users may find that confusing.
Warewolf allows you to create additional delivery status names and map them to channel statuses if your workflow requires.
When a delivery status changes in Warewolf, the channel order is updated to the mapped channel status. Changes in channel order statuses DO NOT change the current Warewolf delivery status.
Stock statuses
Related to delivery statuses are stock statuses. The four stock statuses are:
Part received
Received
Part put away
Put away
These ‘stock statuses’are directly mapped to ‘delivery statuses’ of the same name in the channel
Receiving
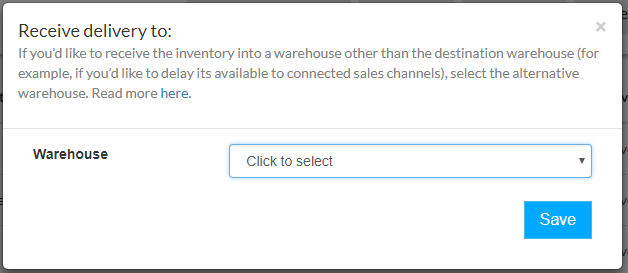
Select a delivery in the deliveries screen and click the ‘receive’ action button. Warewolf opens a model where you can select the warehouse and location for delivery. The generalised process is that goods are received into a specific location and are reconciled against the PO or SC. Then the ‘put away’ step detailed later in this article transfers stock from the delivery location to final storage locations.
![]() Where your business accepts sales orders when there is no inventory in stock, you probably want to receive deliveries into a place where the channel automatic allocation process for inbound sales orders cannot ‘grab’ incoming stock. In the example below, I use a virtual warehouse called ‘deliveries’. This virtual warehouse has three locations corresponding to delivery bay areas.
Where your business accepts sales orders when there is no inventory in stock, you probably want to receive deliveries into a place where the channel automatic allocation process for inbound sales orders cannot ‘grab’ incoming stock. In the example below, I use a virtual warehouse called ‘deliveries’. This virtual warehouse has three locations corresponding to delivery bay areas.
Next, click ‘add location and select zone, aisle, bay, shelf and bin.
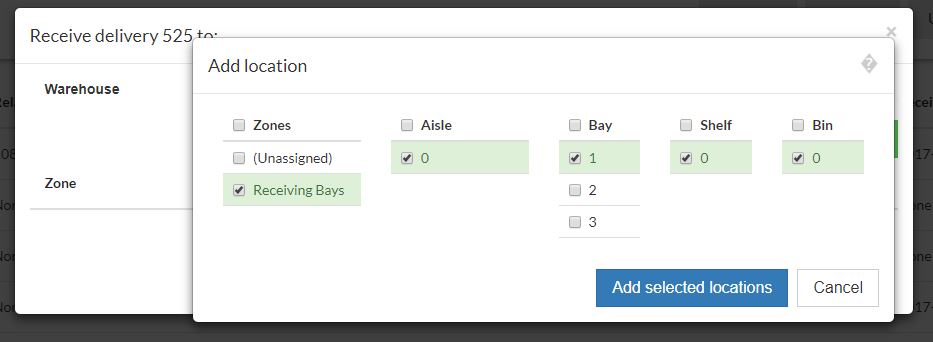
Finally, click ‘add selected location’ then ‘save’.
Warewolf opens the receiving screen for the delivery.
Receiving screen
The receiving screen enables you to scan in products, park the delivery (perhaps the products delivered don’t match the order for example), receive selection and receive all. ‘Receive all’ sends a delivery event to the channel receiving all quantities in the screen regardless of what has been scanned. Receive all is a quick way to deal with small orders, particularly customer returns (SCs). ‘Receive selection’ updates the channel with the quantities scanned so far. Let’s say that the delivery below arrives in several boxes. Very large water bottles!
In the first box there are 5 pink water bottles. Scan in, use the + button or quick quantity feature to increment 0/10 to 5/10. Then click ‘receive selection’. When the screen refreshes, the pink water bottle quantity now shows 0/5. In this way, it’s easy to receive a delivery one bite at a time until complete.

There is a separate article about the quick quantities feature accessed via the blue > button.
Delivery status validations
Note, from the delivery screen, select a delivery and click ‘Receive’. Before the screen opens, Warewolf checks for the following conditions:
If the external PO (or SC) status = ‘cancelled’ or ‘on hold’ or delivery status = ‘Put away’, then Warewolf gives the message ‘You cannot ‘receive’ this delivery’. Similarly, before opening the ‘Put away’ screen the validation is:
If the external PO (or SC) status = ‘cancelled’ or ‘on hold’ or delivery status = ‘Put away’, then Warewolf gives the message ‘You cannot ‘put away’ this delivery’
Exceptions
Manage deliveries where too few arrive
For example, the order is for 10 pink water bottles but only 8 have been received. After receiving is complete, the delivery will show 0/2. In this situation, a suggested approach is to add a comment and set the delivery status to ‘parked’. A manager can review the comment, discuss with the supplier and take appropriate action. That may include changing the delivery status to ‘Put away’.
Manage deliveries where too many arrive
12/10 bottles have arrived, after ‘receive all’, Warewolf will show 2/0. As above, add a comment and set the delivery status to ‘parked’. Similarly, the manager may set the delivery status to ‘Put away’
Last Update: April 16, 2018